Salesforce makes automation more straightforward and powerful with increased Flow capabilities. We talked earlier about the Spring ’25 release. One of the significant additions to it is Reactive Screen Actions. This feature lets you to auto-launch flows from the screen. And that too without a button click. Today, we will see Reactive Screen Actions in Salesforce Flow. We will give you practical examples to help you understand the new feature.
What Are Reactive Screen Actions?
Reactive Screen Actions is a new feature added to the Screen Flow element. It is different from the Action Button component. Reactive Screen Actions execute auto-launched flows whenever users’ input changes. It makes Flows more intuitive, eliminates the need for users to perform redundant manual actions, and enhances user experience.
Building a Flow with Reactive Screen Actions
Today, let’s create a Screen Flow. Why not dynamically fetch Opportunity records based on a selected Account? Keep reading for step-by-step instructions.
Build an Auto Launched Flow
Build an auto-launched flow that retrieves Opportunity records related to a selected Account.
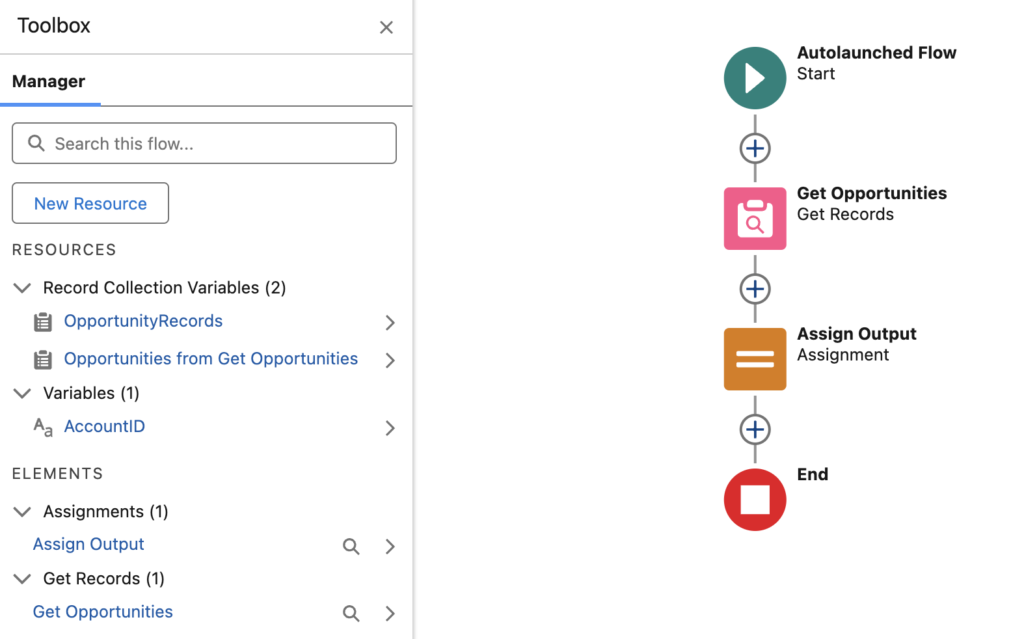
- Input Variable: AccountID (Text) – The flow will receive this Account ID as input.
- Output Variable: OpportunityRecords (Record Collection) – The flow will return a collection of related Opportunity records.
This auto-launched flow will be the core logic of our reactive screen.
Set Up Your Screen Flow
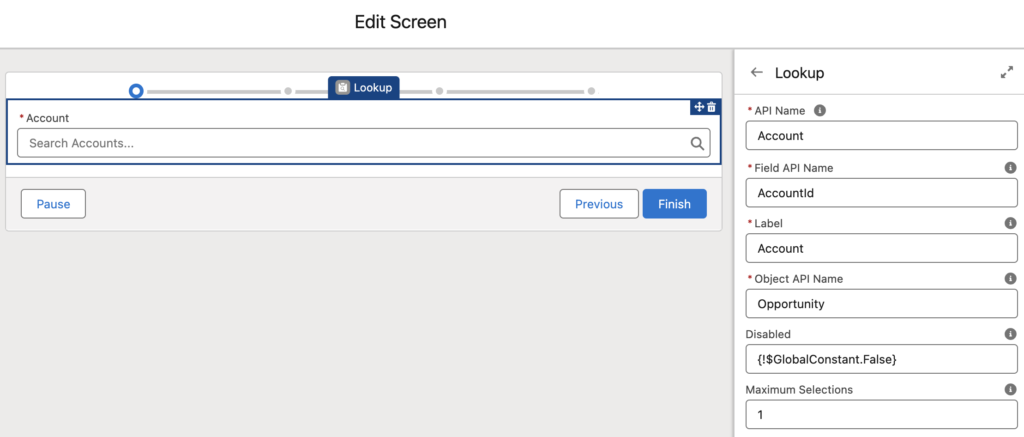
Create a new Screen Flow. Add the Screen element and a screen with a Lookup for a user to get an Account record. Just name the Look up “Account Lookup.”
Configure the Action of your Screen
Within the Screen element, go inside Screen Properties. Insert a Screen action and select one of the screen flows as “auto launched.” Map the AccountID variable from the Lookup component to the flow input. The Screen Action will auto-launch when a user selects or changes an Account in the Lookup.
Display Results
Add a Data Table component to the same screen to display the Opportunity records that the auto-launched flow returned. Bind the Data Table to the OpportunityRecords variable. With each selection of an Account, the corresponding Opportunity records will appear.
Expanding the Functionality with Multiple Screen Actions
The true power of Reactive Screen Actions lies in their flexibility. You can attach many actions to a single screen, thus building more complex workflows. Here, we provide some examples so you can understand the feature.
Example 1: Summarize Opportunity
Add another Screen Action that summarizes the selected Opportunity records. For example, you can display the total revenue or count the records. You could dynamically update a text or number field on the screen.
Example 2: Make HTTP Callouts
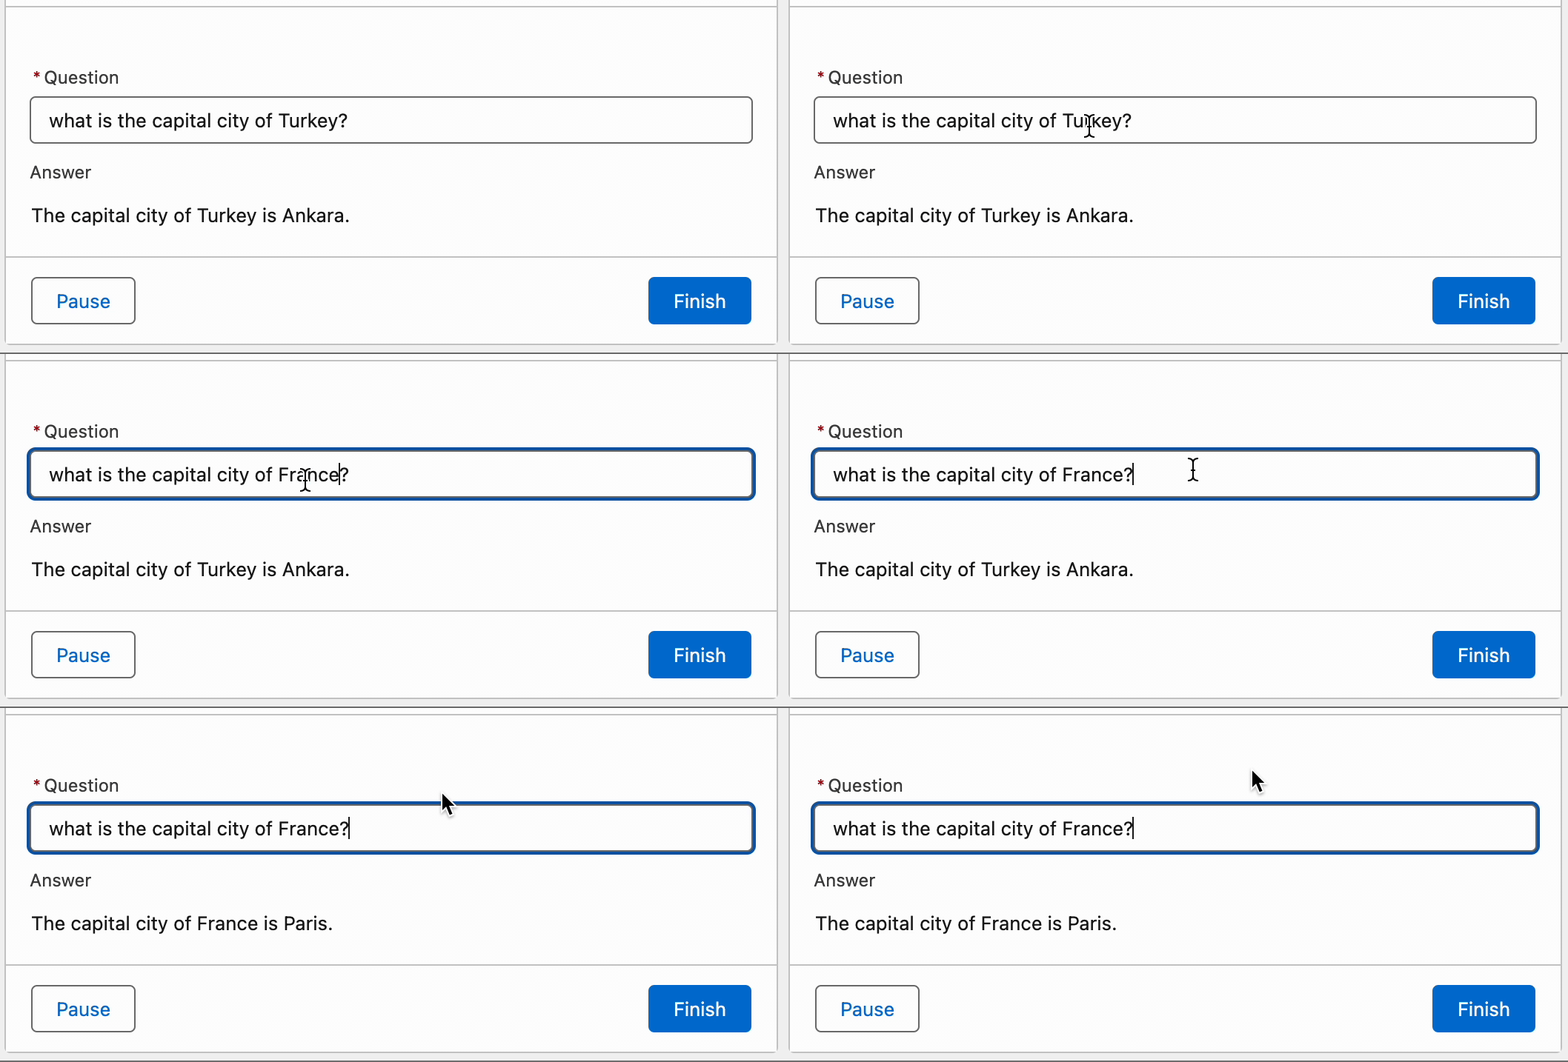
Reactive Screen Actions can also trigger flows that make external API calls. For example, when a user types a question into a text field, the Screen Action can trigger an auto-launched flow that calls ChatGPT and returns the answer.
Example 3: Enhance File Uploads
The default File Upload component does not confirm uploads. With Reactive Screen Actions:
- Start a flow that retrieves uploaded files when the user uploads them.
- Show the uploaded files in a Data Table to verify.
Why Reactive Screen Actions?
Reactive Screen Actions make advanced automation possible:
- Update dynamic, related data without human involvement.
- Automate real-time computations, updates, or complex workflows.
- Make API callouts externally to validate data or even generate content.
Best Practices with Reactive Screen Actions
When you follow specific rules, any new feature can give you the utmost benefits. Here, let us see some best practices for avoiding pitfalls.
- Optimize Autolaunched Flows: The flows used in Screen Actions must be optimized enough to avoid delays.
- Test Thoroughly: Test screen behavior for all types of scenarios. Check if you get the desired reaction.
- Use Descriptive Labels: Label all components and Screen Actions to simplify troubleshooting.
- Use Dynamic Outputs: Combine Screen Actions for more interactive, dynamic screens.
Final Thoughts
Reactive Screen Actions transform Salesforce’s interaction with its users. Now, you can retrieve related records or enhance file uploads. There’s nothing that one cannot do in Salesforce. Start introducing Reactive Screen Actions in your Salesforce solutions today. Tap their full power into workflows to save time for your users. Do you have any questions, or would you like some additional examples? Feel free to post your comments below!


